Table des matières
Tags allow you to organise your photos in batches when importing them. They are useful for quickly finding a series of photos, filtering the gallery or structuring a multi-print album.
Procedure #
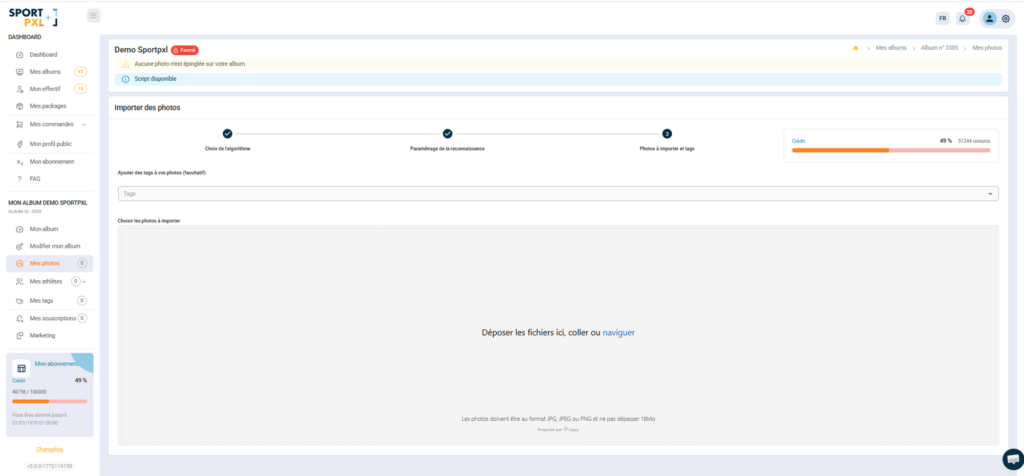
Tags are added in the third step of the import process — “Photos to import and tags” — after selecting the algorithm and configuring the recognition settings.
- From step 3 of the import process, locate the field "Add tags to your photos (optional)".
- Click on the Tags field and enter your tag in free text (e.g.:
Arrivée,10 km,Départ dimanche) - Press Enter to add the tag.
- Repeat to add up to 3 tags per batch
- Drop your photos into the drop zone and start importing.
Reusing existing tags #
If you have already created tags for this album during a previous import, they will appear as suggestions in the drop-down menu as soon as you click on the field. Select one directly to apply it without re-entering it.
Best practices #
- Use short, consistent tag names throughout the album (e.g.
10km,25km,50kmrather than variations) - For a multi-event competition, tag each batch with the name of the corresponding event — this makes it easier to filter and correct identifications.
- Tags are visible to the public — choose titles that are understandable to participants.
💡 Accepted formats are JPG, JPEG, and PNG. The maximum file size is 18 MB.


